Do you want to install barn doors in your home? This can be a simple project that one person can do in an afternoon. Below, you’l see how to hang a sliding barn door in 5 simple steps…

Note: Actually, the easiest fool-proof way to do it is with an all-in-one door and track kit where everything is already measured for you and the parts all fit together. Plus, the bundled package can save you money too.
Step 1: Measure the Doorway Opening
Standard interior doorway dimensions are typically 80 inches tall and have widths ranging between 28 and 36 inches wide. While swing-open doors will fit these measurements perfectly, sliding barn doors need to be slightly taller and wider to completely cover the opening.
Generally, you want to add 2-4 inches to the width and 1-4 inches to the height of the opening to determine the proper barn door size. For example, a 30-inch wide doorway opening at 80 inches tall would need a sliding barn door measuring 32-34″ wide x 81-84″ tall.
- Width: 32-34 inches (30 inches + 2-4 inches)
- Height: 81-84 inches (80 inches + 1-4 inches)
Step 2: Get a Sliding Door Track on Which to Hang Your Door
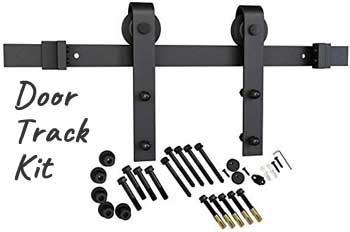
Next, get a sliding door track. These typically come in kits which include the rail, door hangers, rollers, stoppers and bolts to secure the track to the wall and the hangers to the door.
These all-in-one kits make installation much easier (with less guessing). However, you will need to know the size of your door opening to know which track kit to get.
Barn door track kits will tell you the door panel width that they fit as well as their weight capacity.
In general, a 6-foot 6-inch long track will fit most interior door openings, but you can get them in many different lengths to fit larger custom size doorways.
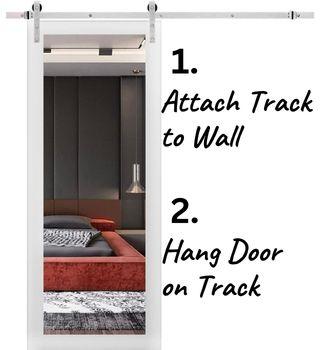
Step 3: Install the Track on the Wall
Next, attach the track to the wall above the opening, making sure it is level. Use a stud finder to find the studs in the wall, and attach the track to the studs if possible.
How Do You Hang a Sliding Barn Door Without Studs? If the wall studs don’t match up with the holes in the track, use wall anchors instead (also included in the kits).
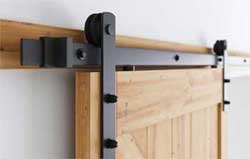
Step 4: Attach the Hangers to the Door
The door hangers bolt onto the door panel and roll along the rail on the wall. This step is simple and doesn’t take a lot of time, but you want to make sure that the door is level hangs about 1/4″ off the floor. Kits include instructions on how to do this step by step.
Once you have attached the hangers to the door, hook the rollers on the wall track and make sure that the door rolls smoothly back and forth.
Note: Keep in mind that if you get a natural unfinished wood door panel, you’ll want to stain, paint or seal it first before you attach the hardware.
Step 5: Install the Door Stoppers & Floor Guide
Lastly, place the door stoppers on each end of the track to prevent the rollers from rolling off the edge of the rail. Then, install the floor guide to keep the door from swinging in and out.
If you want to add finishing touches to your door, you can find accessories here: barn door handles and barn door locks.